April 2, 2026
Introducing Tags in UploadCam

We’re excited to introduce Tags for Teams in UploadCam, a simple but powerful way to organize, categorize, and find your photos faster.
🏷️ What are Tags?
Tags are custom labels created by your team admin that can be applied to photos.
For example, you might create tags like:
• Before
• After
• In Progress
• Issue
• Completed
Once set up, your team can apply these tags while taking photos — or after — making it much easier to filter and find exactly what you need later.
⚙️ Step 1: Create Tags (Admin Setup)
To get started, a team admin needs to create tags:
1. Go to the UploadCam Admin Panel
2. Navigate to the Tags page
3. Create the tags your team will use
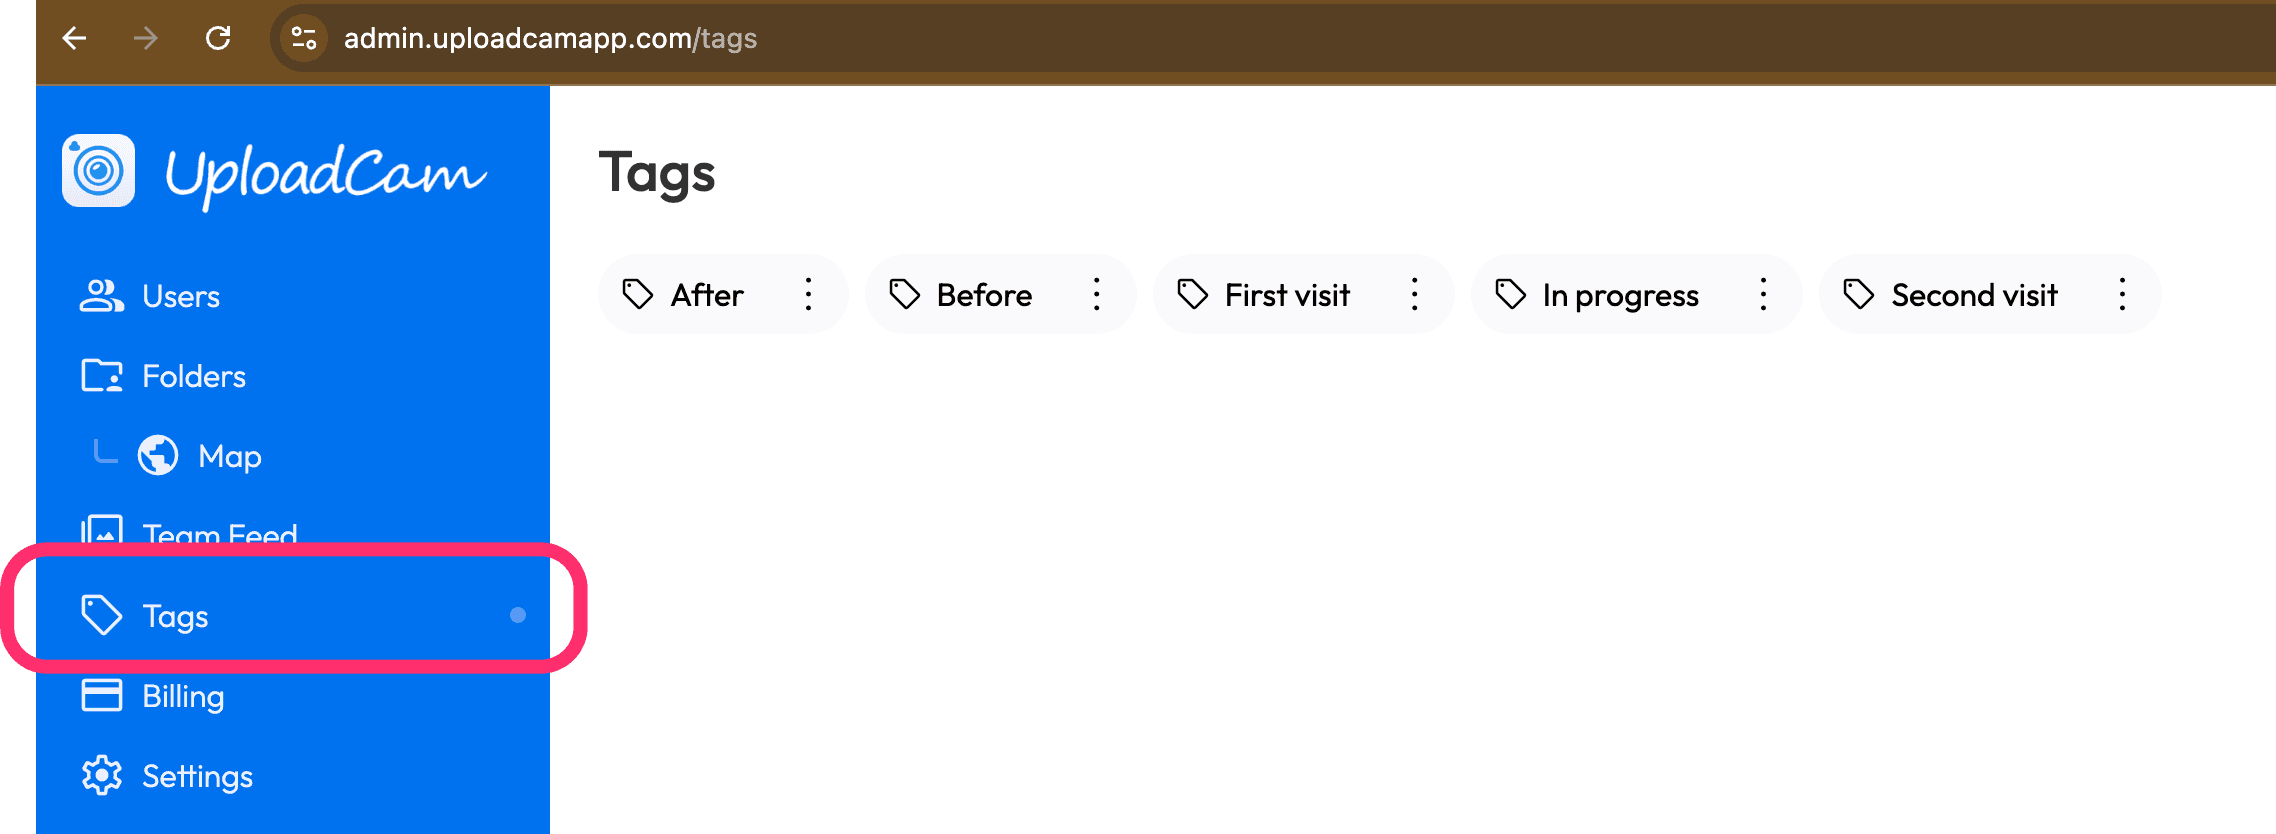
💡 Tip: Keep tags simple and consistent so everyone uses them the same way.
📸 Step 2: Apply Tags While Taking Photos
Applying tags in the field is quick and seamless:
1. Open the UploadCam mobile app (iOS or Android)
2. Go to the Camera screen
3. Tap the new Tags button:
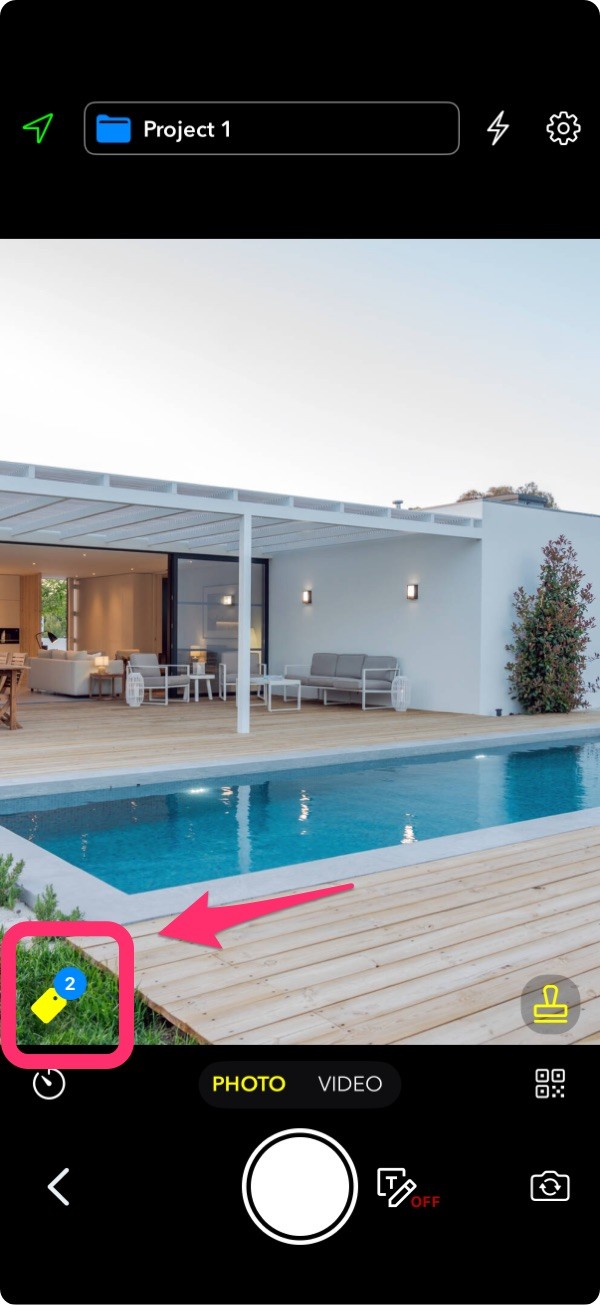
4. Select one or more tags
5. Take your photos
All photos taken will automatically include the selected tags.
✅ This is perfect for capturing structured data in real time, no extra work later.
✏️ Step 3: Add or Edit Tags After Taking Photos
Forgot to tag a photo? No problem.
You can easily update tags anytime:
1. Go to the “My Photos” tab in the app
2. Open a photo
3. Add, remove, or edit tags
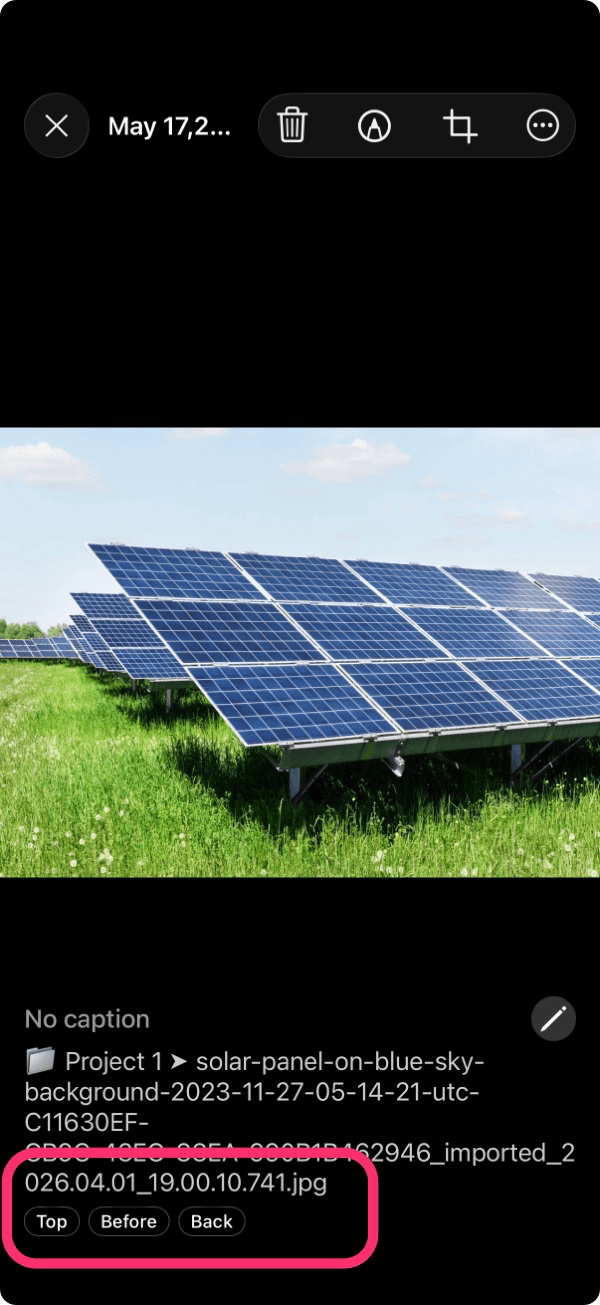
This gives your team flexibility without breaking your workflow.
🔎 Step 4: Filter and Manage Tags in the Admin Panel
Tags really shine when reviewing and managing photos:
1. Go to the Team Feed in the admin panel
2. Use the tag filters to quickly find relevant photos
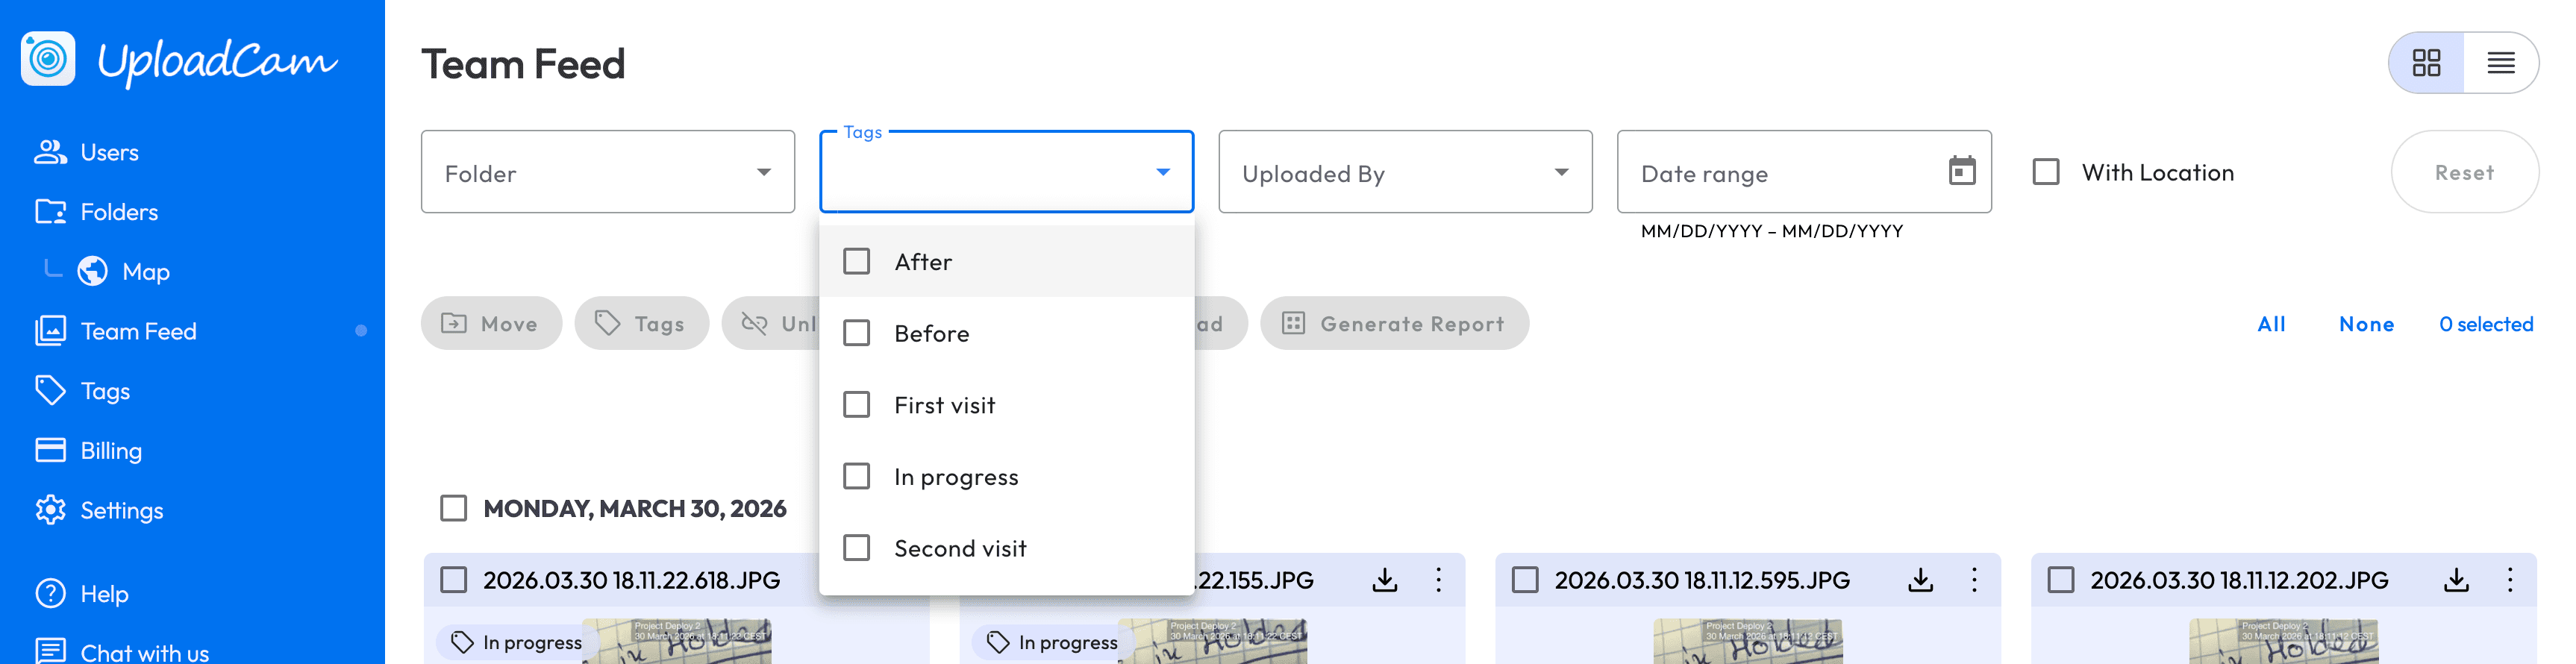
🎯 This makes it easy to track progress, review work, or generate reports.
============
Tags are available now for all UploadCam team accounts.
If you have any feedback or ideas, we’d love to hear from you here or email us at support@uploadcamapp.com Your input helps us make UploadCam even better.